STATIC WEB HOSTING
WHAT IS WEB HOSTING
Web hosting is an online service that allows you to publish your website files onto the internet. So, anyone who has access to the internet has access to your website. In practice, it usually refers to the service you get from a web hosting provider like webs3code.com.
STATIC VS DYNAMIC HOSTING
A static website is one with stable content, where every user sees the exact same thing on each individual page. On the other hand, a dynamic website is one where content is pulled on-the-fly, allowing its content to change with the user.
A static website is delivered to a user exactly the way it's stored. That means that nothing on the page will change by the user or even the site administrator unless there's a redesign of the site, or the site administrator goes directly into the code to change it.
On this topic, we are going to focus on three type of static web hosting that are worldwide accessible free for hosting services. This includes :
Google Cloud Hosting ( Drv.tw )
Amazon Aws S3 Hosting
Cloudflare Pages Hosting
1. Google Cloud Hosting ( Drv.tw )
Google Drive Cloud storage is a place where you can easily store and share important files and folders. Because they are hosted on Google's “cloud” they are secure and accessible from anywhere and you can use any internet-connected device to access or share your files.
DriveToWeb liberates website creation by enabling you to quickly spin up full HTML sites (CSS, Javascript, and media files included) using files stored on cloud drives, such as Google Drive and Microsoft OneDrive.
STEPS :
Using Google Drive or Microsoft OneDrive
1. Create a new folder in Google Drive/ Microsoft OneDrive.
2. Upload the contents of your website’s file and move them to the folder.
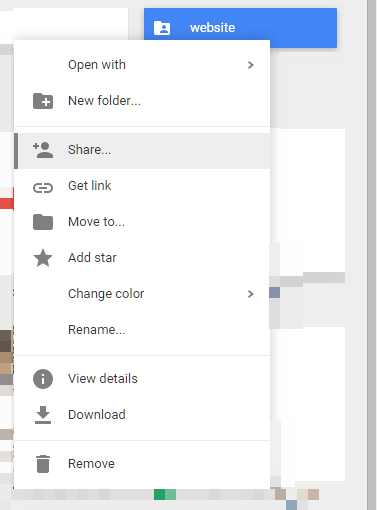
3. Right click the folder and choose ‘share’, then ‘advanced’ at the bottom of the popup.
4. Choose ‘Anyone with the link’ and save.
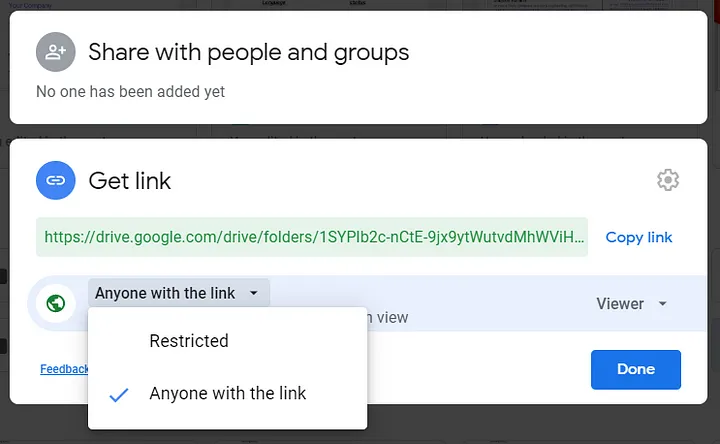
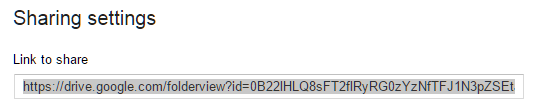
5. After hitting save, you’ll be given a public link but it will be a link to the folder your .html files are stored in on Drive, not an actual website.
Go to Drv.tw website, select the drive(Google Drive or OneDrive). This will redirect to their respective page of hosting link.
Allow access to your account. Finally, You will see one link will appear on website.
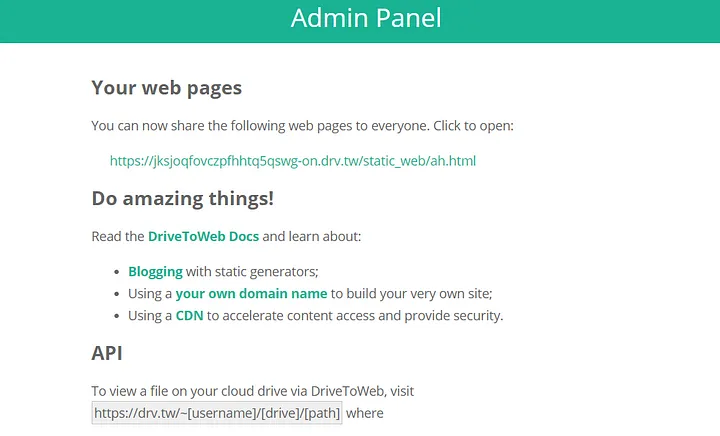
Congrats🎉, Your page is hosted successfully. Click on the link to see your free hosted website.
Using A Custom Domain Name
When you log-in to DriveToWeb, your content can be found under a domain name that looks like ptjmp8b6xwmygzg4jlm2pa.on.drv.tw. There is a way to use your own domain name to replace the provided .on.drv.tw name.
You need to modify your DNS records to link a domain name to a DriveToWeb folder.
For example, you can set up a website as URL http://www.example.com and point it to the contents of https://ptjmp8b6xwmygzg4jlm2pa.on.drv.tw/www.example.com/ (the host name of your website, www.example.com, must match the root-level folder name as seen in this URL), you need to do the following:
1. In the DNS setting for domain example.com, create a CNAME record that sets name www to point to target ptjmp8b6xwmygzg4jlm2pa.on.drv.tw.
2. On your cloud drive, at the root level, create a folder named www.example.com and put your contents in there. It is recommended that you name your entry point index.html.
3. It may take up to 72 hours for your DNS settings to become active. After that you will be able to access your content at https://ptjmp8b6xwmygzg4jlm2pa.on.drv.tw/www.example.com/ as http://www.example.com.
You can get your domain name at Namecheap, our recommend most affordable domain name provider.
2. Amazon Aws S3 Hosting
Amazon Simple Storage Service (Amazon S3) is an object storage service that offers industry-leading scalability, data availability, security, and performance. You can use Amazon S3 to store and retrieve any amount of data at any time, from anywhere.
STEPS :
Create an S3 Bucket on Aws
The first step to hosting a static website on AWS S3 is to create an S3 bucket in your account. After creating the bucket, we will upload the website contents and files in our bucket. The website content will then be assigned specific permissions to be accessible to the public.
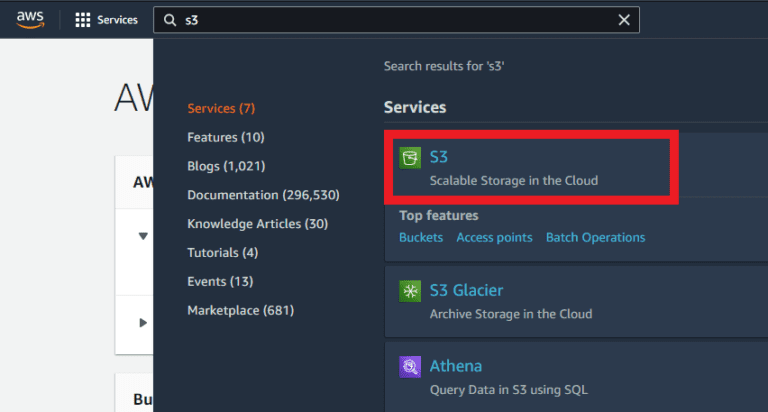
Login to your AWS management console and go to the search bar and search for S3 there. This will lead you to your S3 dashboard:
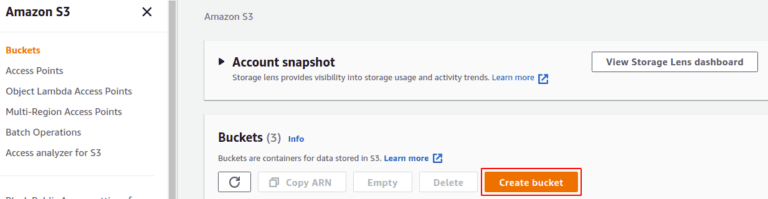
Click on Create Bucket at the right corner of the S3 console:
Next, you need to provide your S3 bucket name, the region where you want your bucket to be created, and then configure your bucket’s security and privacy setting:
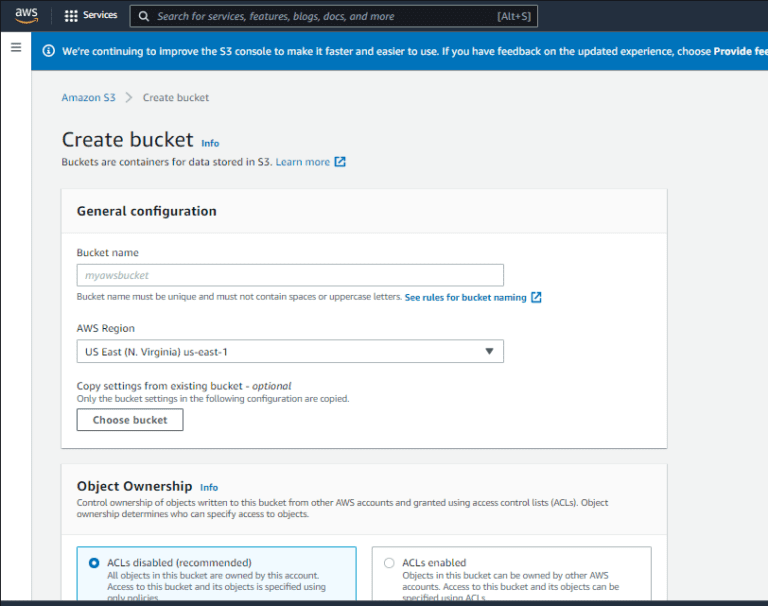
Enter Bucket Name, try to make it look like your domain. The bucket name should be unique for all AWS accounts around the world:

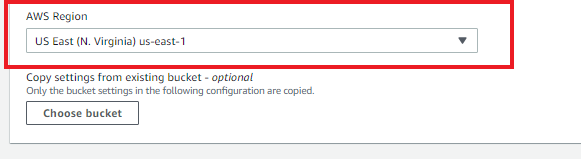
Select the region in which the S3 bucket will be created. Try to select a region near the public that will access the website:
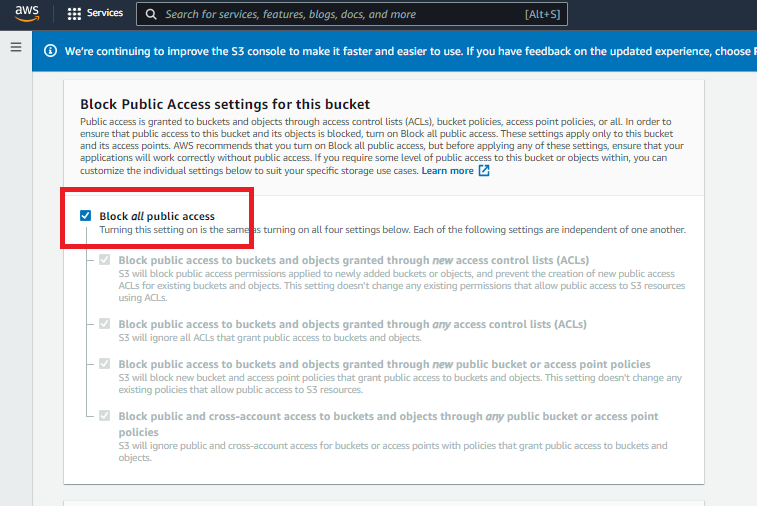
Since we wanted the website to be accessible to the audience, we had to grant the public access to the objects of this S3 bucket. For that, uncheck the Block all public access checkbox in the “Block Public Access setting for this bucket” section:
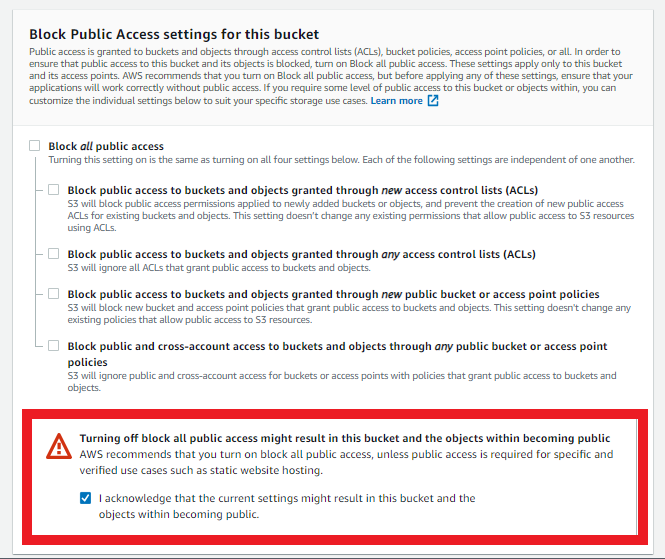
After configuring the public access settings, a section will appear to acknowledge the S3 bucket and its content being made public. Check the box to acknowledge it:
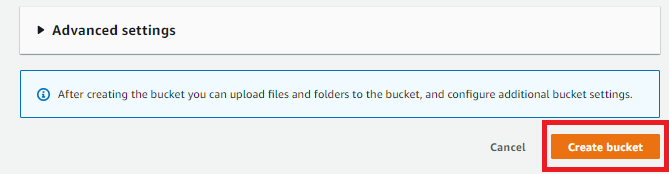
Now, you have finished setting up your bucket, leave other options and settings as it is, and just click on the Create Bucket button at the bottom right corner:
If the bucket name you specified is unique, the S3 bucket will be created. Otherwise, you will get an error, and you have to change the bucket name.
Upload Your Website to the S3 Bucket
After creating the S3 bucket, it is time to upload website content to the S3 bucket. From the S3 console, select the S3 bucket you just created:
Go to the Objects section, and then Click on the upload button. Now, browse your system for the directory you want to upload into the S3 bucket. Select the static website directory and upload it to the S3 bucket:

Uploading the static site content may take some time depending upon the size of the folder:
After a successful upload, click close at the right corner. You will be directed back to the object section.
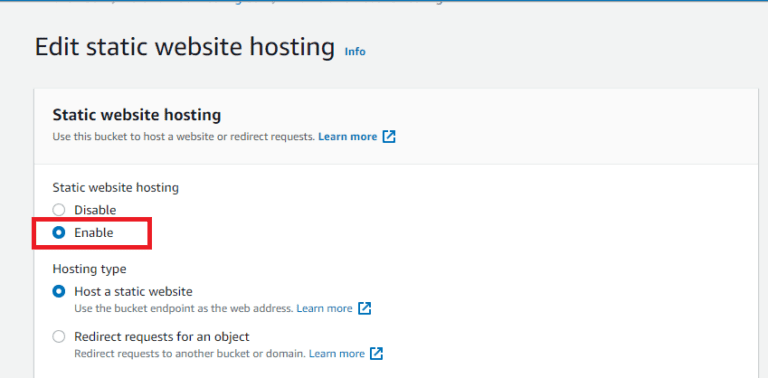
Setting up Static Web Hosting in S3 Bucket
To make our content accessible publicly, we need to add a bucket policy for which we have to go to the permissions tab of our S3 bucket to make some changes to the permissions of our S3 bucket:
Now, move to the bucket policy section and click on the Edit button:
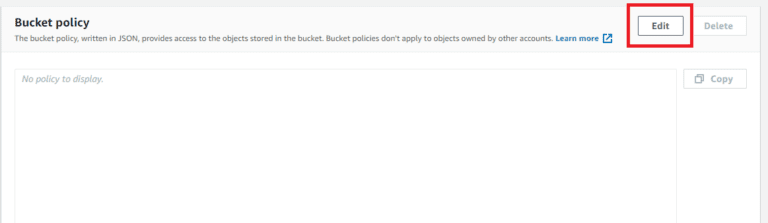
Paste the following JSON in the editor to allow the public to read files from the bucket:
Make sure to replace “YOUR-S3-BUCKETNAME” with your S3 bucket name in the JSON policy.
Accessing the Website Through URL
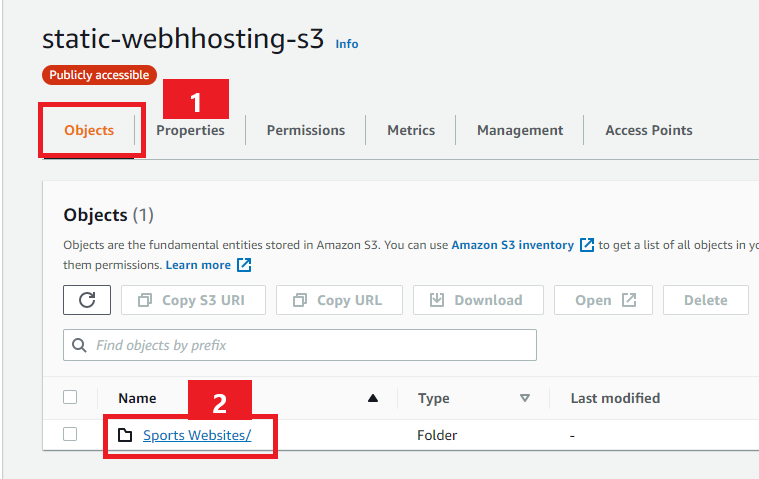
After setting the permissions for the bucket, it’s time to access the webpage through the URL. For this, go to the Objects tab of the S3 bucket and go to the static site directory:

Look for the index.html file in the folder, which you defined as the index document for this project. Click on the index.html file:

Now, in the object overview section under the properties tab, you can find the URL of the static website:
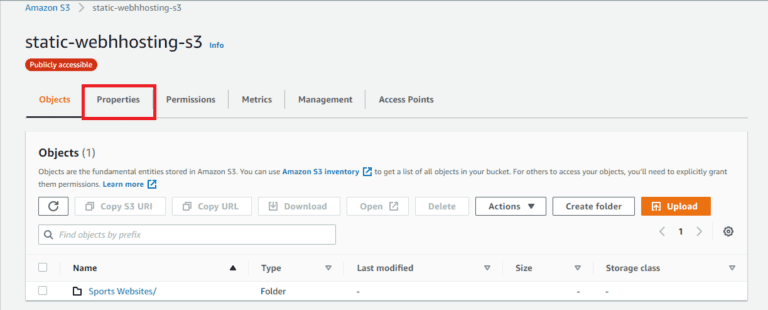
Go to this URL, and the static website hosted on the AWS S3 bucket will be accessible via browser:

3. Cloudflare Pages Hosting
Cloudflare Pages is a JAMstack platform for frontend developers to collaborate and deploy websites.
PREREQUISITES :
Cloudflare account, if you don’t have one create here
GitHub account, if you don’t have one create here
A GitHub repository with an index.html file
STEPS :
Preparing Github Repository
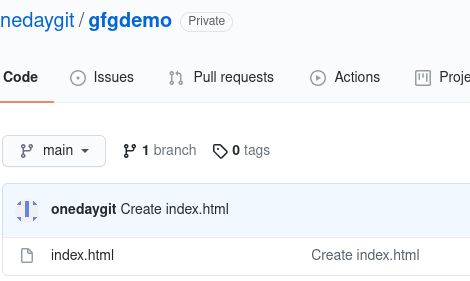
Cloudflare pages similar to Netlify pulls content from the Github repository then build the site and publishes it to their CDN. You can your static site with plain HTML (or) any static Site generator like Hugo, Next.js, Jekyll. Your repository must have at least 1 file and a compulsory index.html file should be present. Below is my simple GitHub repository with index.html file
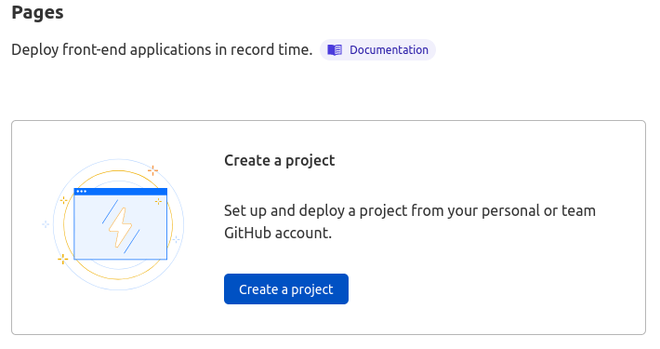
 Deploying to Cloudflare pages
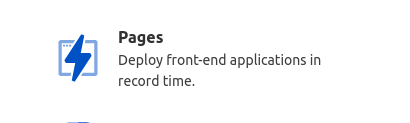
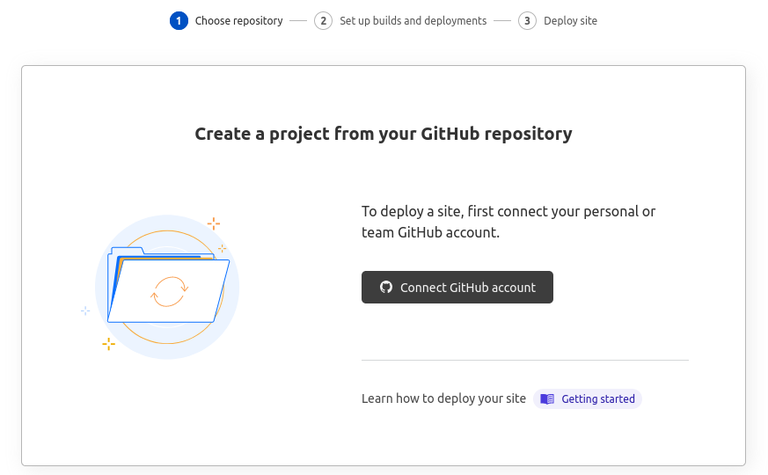
Login into your Cloudflare account and click on the Pages icon on the right side menu, this will take you Cloudflare Pages dashboard. Then click on create the project.
This will take to you a webpage that asks you to connect to your GitHub account.
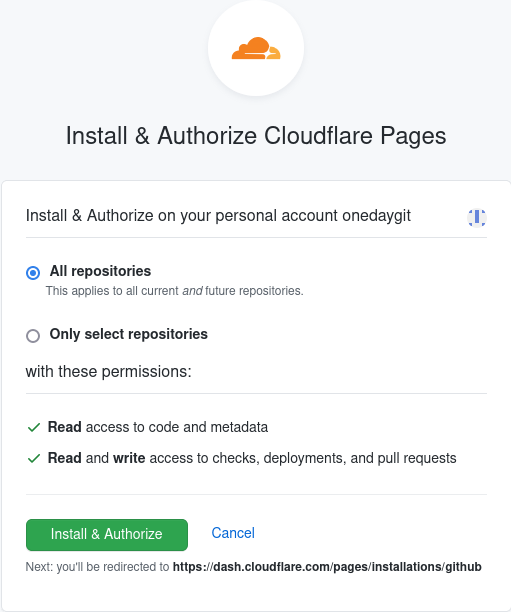
Now authorize the repositories you want Cloudflare pages to get installed, you can select all repositories (or) selected repositories
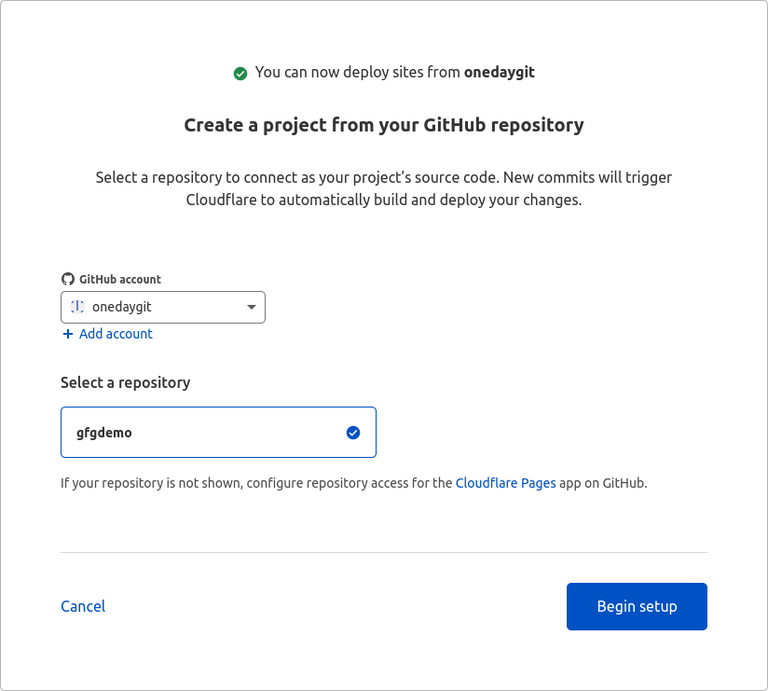
Select the repository you want to deploy and configure the deployment settings
Now select the deployment configurations
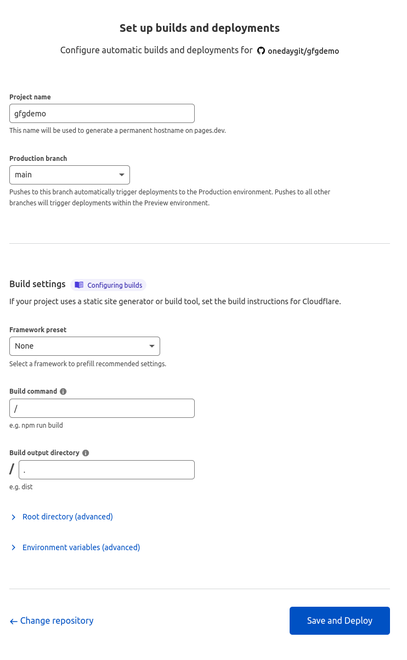 Name of the project: give a name to your project
Production branch: branch of the repository you want to deploy
Framework: Select the framework you have used in your project select None for static HTML, React, Hugo, and more
Build command: Command to build the website, If you choose none in the framework leave it blank, or else it will be automatically applied according to your framework. If you have used a custom framework give your custom build command.
Build Output folder: Directory of output from the build command, If you choose none in framework leave it blank, or else it will be automatically applied according to your framework. If you have used a custom framework give your custom build output directory.
Name of the project: give a name to your project
Production branch: branch of the repository you want to deploy
Framework: Select the framework you have used in your project select None for static HTML, React, Hugo, and more
Build command: Command to build the website, If you choose none in the framework leave it blank, or else it will be automatically applied according to your framework. If you have used a custom framework give your custom build command.
Build Output folder: Directory of output from the build command, If you choose none in framework leave it blank, or else it will be automatically applied according to your framework. If you have used a custom framework give your custom build output directory.
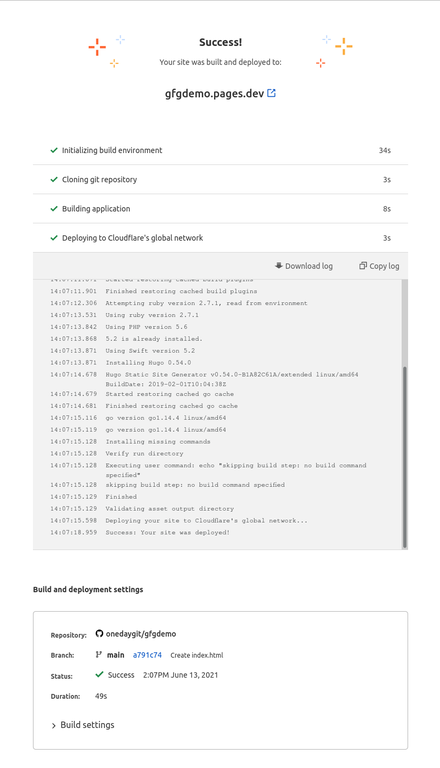
After you have selected your configuration, click on save and deploy.
Now Cloudflare will build and deploy your site, if you have done everything correctly you will see something like below:
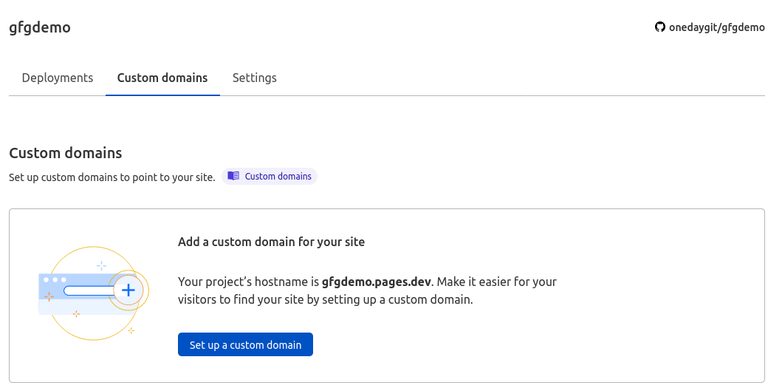
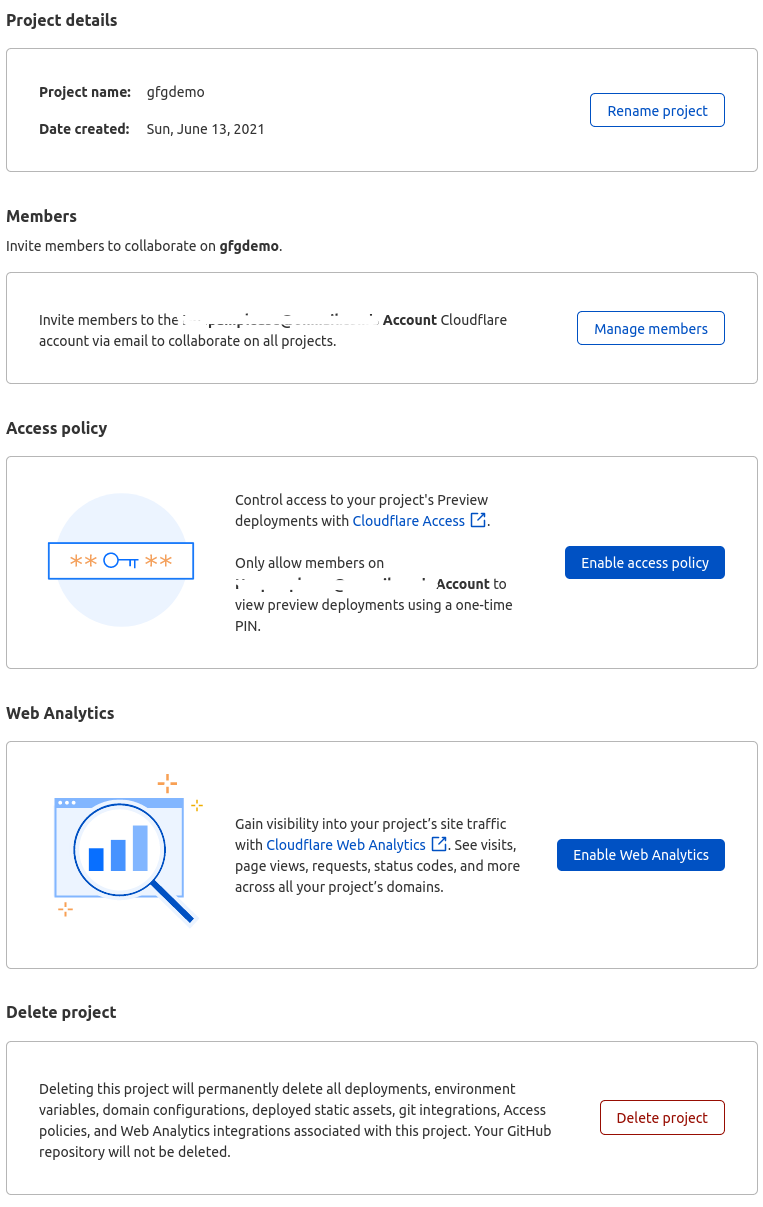
You can connect to a custom domain from the project dashboard, and You can also enable analytics and access policies from project settings.